Are you looking for an easy way to upload files in Webflow? If so, look no further! In this article, we’ll take a deep dive into Webflow file upload to show you just how easy it is to get started. With the right strategies and techniques, you’ll be able to quickly and easily upload files in Webflow – no matter what type of file it is.
Steps to Get Started with Webflow File Upload
All you need to do to begin using the Webflow file upload form is to do the following actions:
1. Log in to your Webflow account and open your project.
2. Go to the Designer interface and navigate to the page where you want to upload the file.
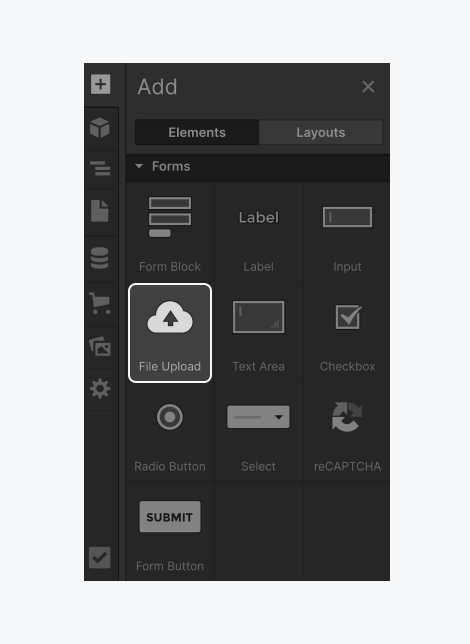
3. Add an element to the page where you want the file to be accessible (e.g, file upload button, link, or image).
4. With the element selected, open the Settings panel on the right-hand side.
5. Look for the “Link Settings” or “File Upload” options, depending on your element.
6. Click on the file upload button or browse for the add file you want to upload from your computer.
7. Once you’ve selected the file, it will be uploaded to Webflow.
8. Configure any additional settings or options for the file, such as alternative text for images.
9. Save your changes and publish your site for the file to be accessible on the live version of your website.
100+ Top-notch Webflow Templates
Take your website design to the next level with our stunning collection of Webflow templates.
Advantages of Using Webflow File Uploads
Webflow File Upload provides numerous advantages that make it easy and convenient for users to upload their files. Here are just a few of the benefits you can gain from using Webflow’s file upload feature:
Faster File Delivery:
With Webflow, you can quickly and easily upload files to your website in a matter of seconds, allowing your visitors to access them almost instantly.
Higher Security:
Webflow’s secure file uploading system ensures that your uploaded files are always protected from unauthorized access.
Easier Collaboration:
With Webflow, you can easily share files with colleagues or clients and keep track of changes made to the files over time.
Improved Usability:
Webflow’s simple and intuitive user interface makes it easy for users to upload files without any technical knowledge.
Recommended Blog post for you
👉 Are You Looking to Hire Webflow Developer? Here’s What You Need to Know
👉 5 Webflow Dashboard Templates to Level Up Your Site
👉 Top Webflow Landing Page Templates That Will Skyrocket Your Conversions
Frequently Asked Questions
What types of files can I upload to Webflow?
You can upload different file types, including images, videos, documents, and more.
How do I access the uploaded files on my website?
Once you’ve uploaded your files to Webflow, they will be accessible on the live version of your website.
Is there a limit to the size of the files I can upload in Webflow?
Yes, there is a limit to the file size that can be uploaded. The maximum file size allowed depends on your current plan and subscription.
Is there any cost associated with using Webflow’s File Upload feature?
No, you can use this feature for free with any Webflow plan.
Final Thoughts
Webflow file upload feature is an easy and convenient way to get your files onto the web. With its intuitive user interface, secure system, and optimized performance, you can quickly and easily access or share any file type on your website without worrying about security or size limitations. So if you’re looking for an efficient and reliable way to upload files in Webflow, look no further – this feature has got you covered.
100+ Top-notch Webflow Templates
Take your website design to the next level with our stunning collection of Webflow templates.